
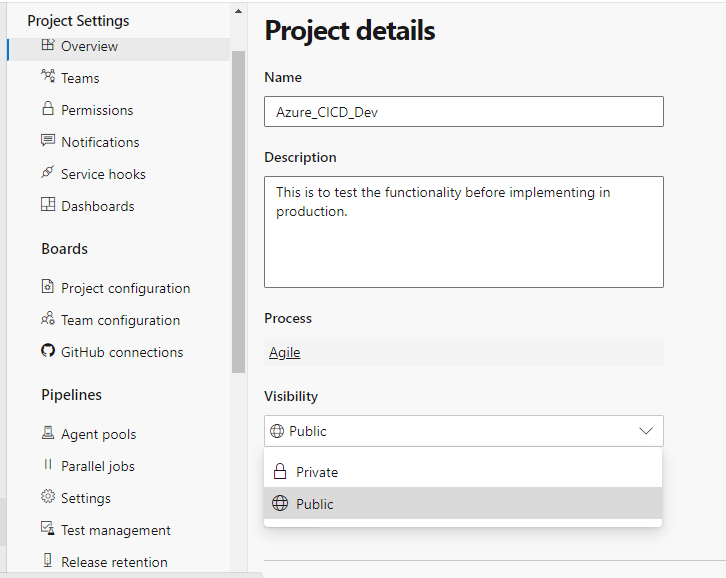
- Create a new Azure DevOps Project if it doesn’t exists
- Import Repo https://github.com/nextopsvideos/sonarqube to the Azure DevOps Project
- Import Procedure :
4.Create a New Pipeline

Select Classic Pipeline
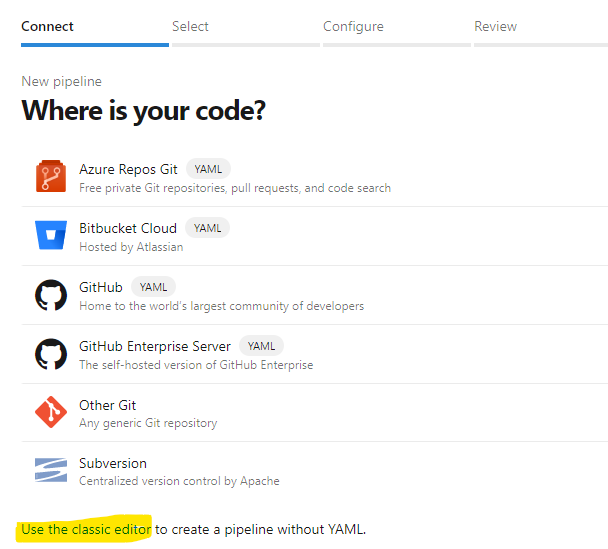
Select a sources
Click on Azure Repos Git and select correct Repo from drop down, SonarCloud in our case.

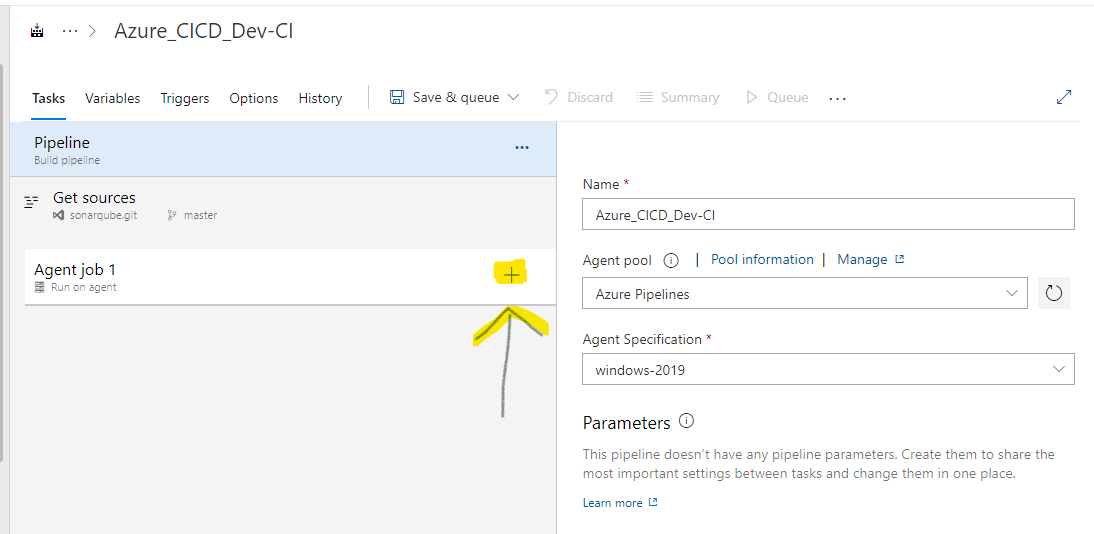
Choose Empty Job templates

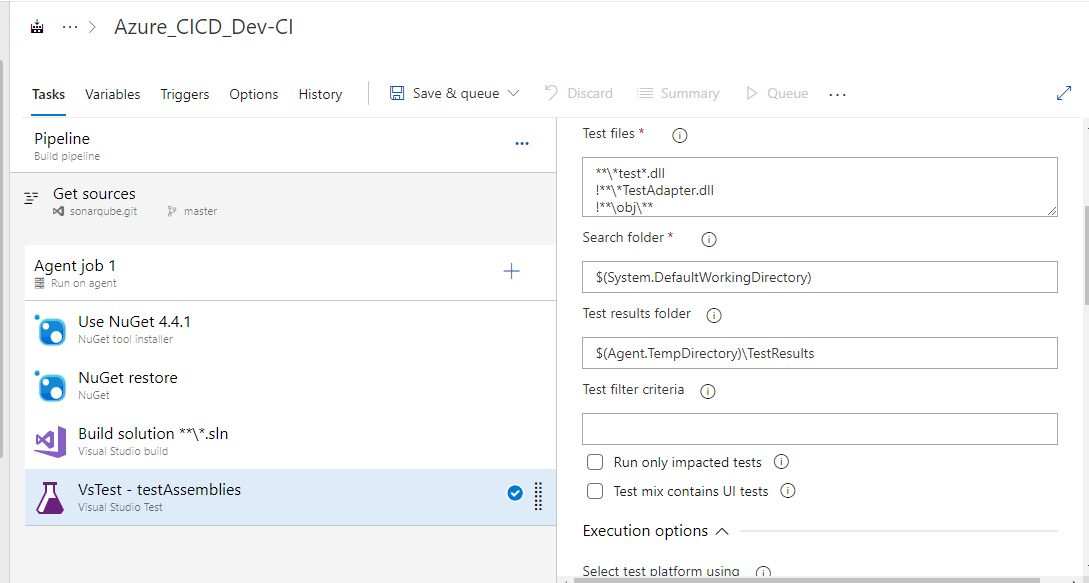
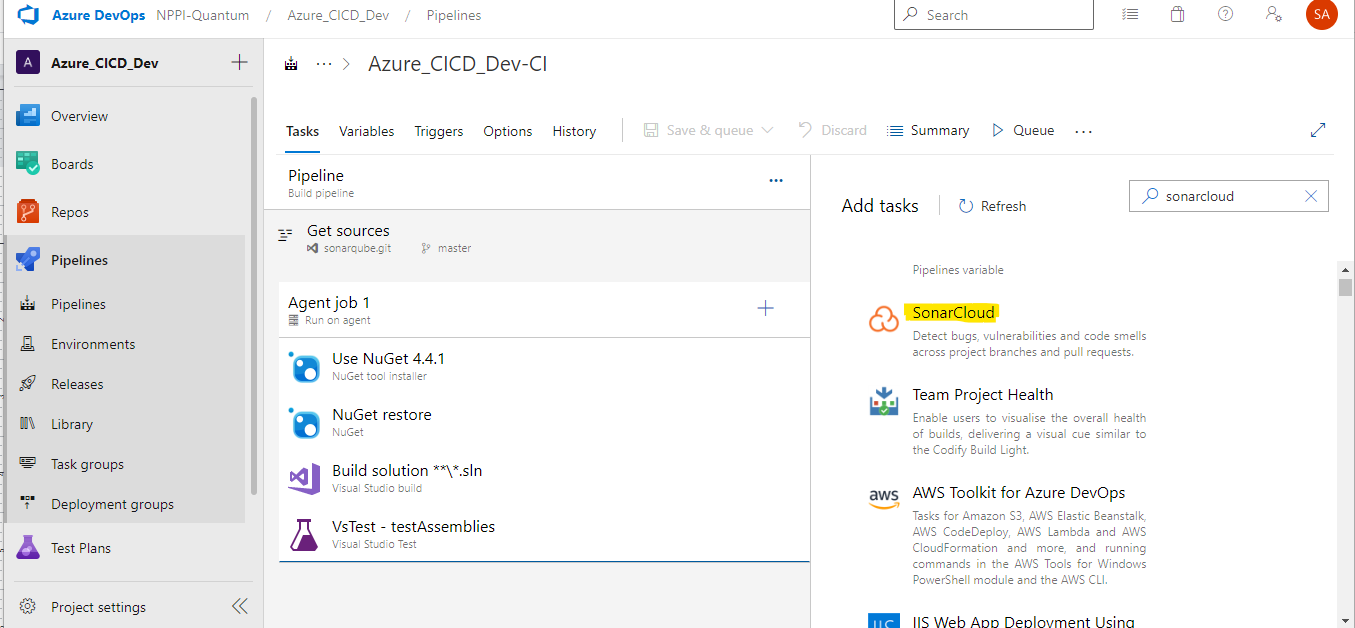
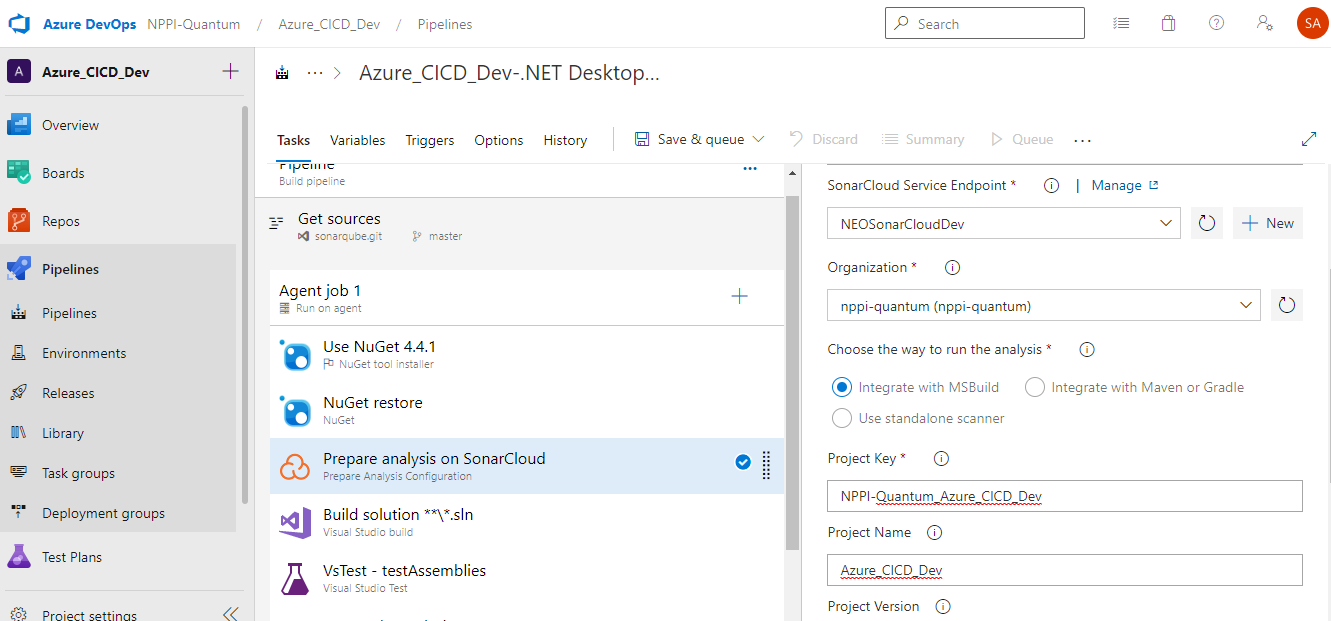
Add below tasks :
NuGet tool Installer
NuGet restore
Build solution
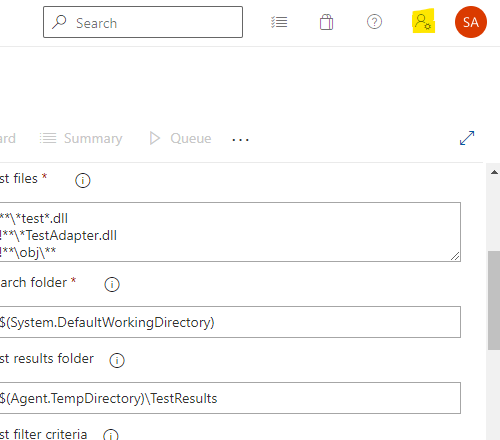
VsTet – testAssemblies
Below are the tasks to select :


———————————————————————————————————————-
Task Settings
NuGet Tool Installer Task
Add Version No

NuGet restore Task
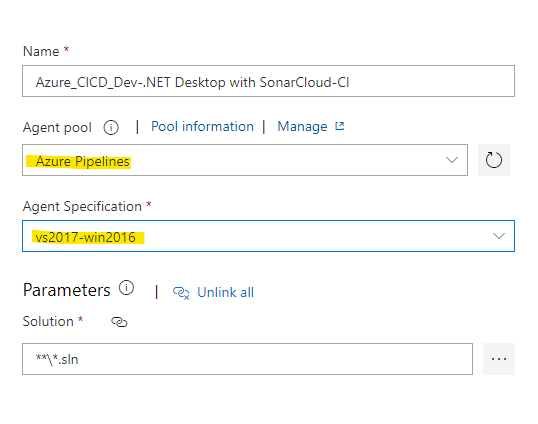
Select the solutons file (.sln), by default **/*.sln is mentioned in tool, we can browse the Repo by clicking on 3 Dots.

Build Solution tool configuration
We can directly add values or use variables
Below are default variables, we need to add required
Below new variables can be added :


VsTest – testAssemblies Task
Leave default values
Login to SonarCloud
Url : https://sonarcloud.io/
Click on Login > Login with Azure DevOps
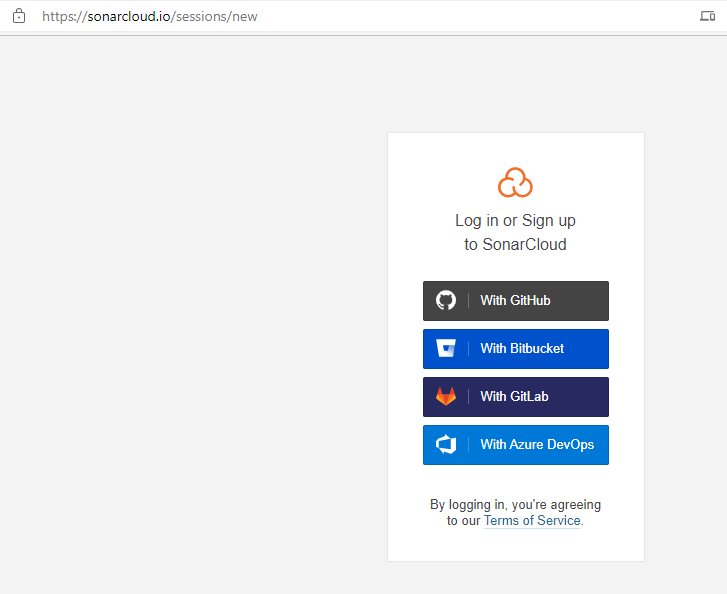
Accept :

Register as public cloud to view project list.
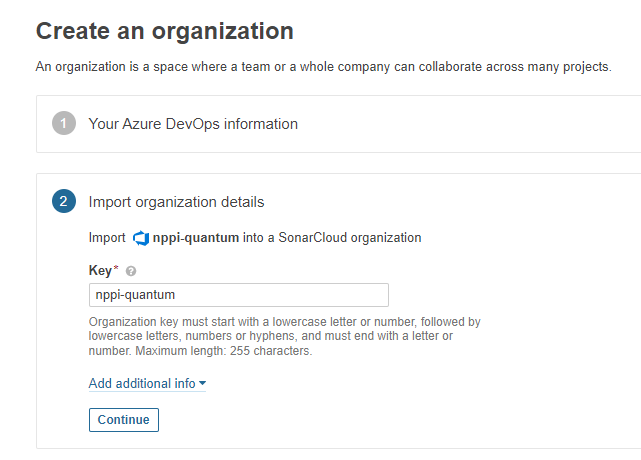
Click on Import New Organization, Make sure the Organization name exists in Azure DevOps

Click on User image on right top
Token : kujgnz7aubggo2pnehp53fzhuwlyisgushq2wmag6veixpy7mdbq
Provide Full Access
Make sure

Import Organization
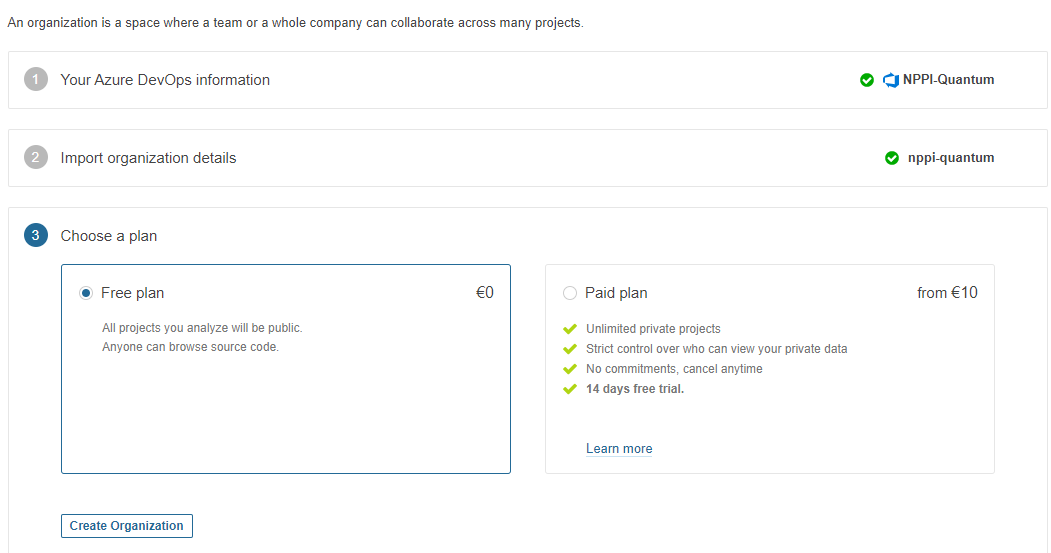
Proceed with the free plan & click Create Organization

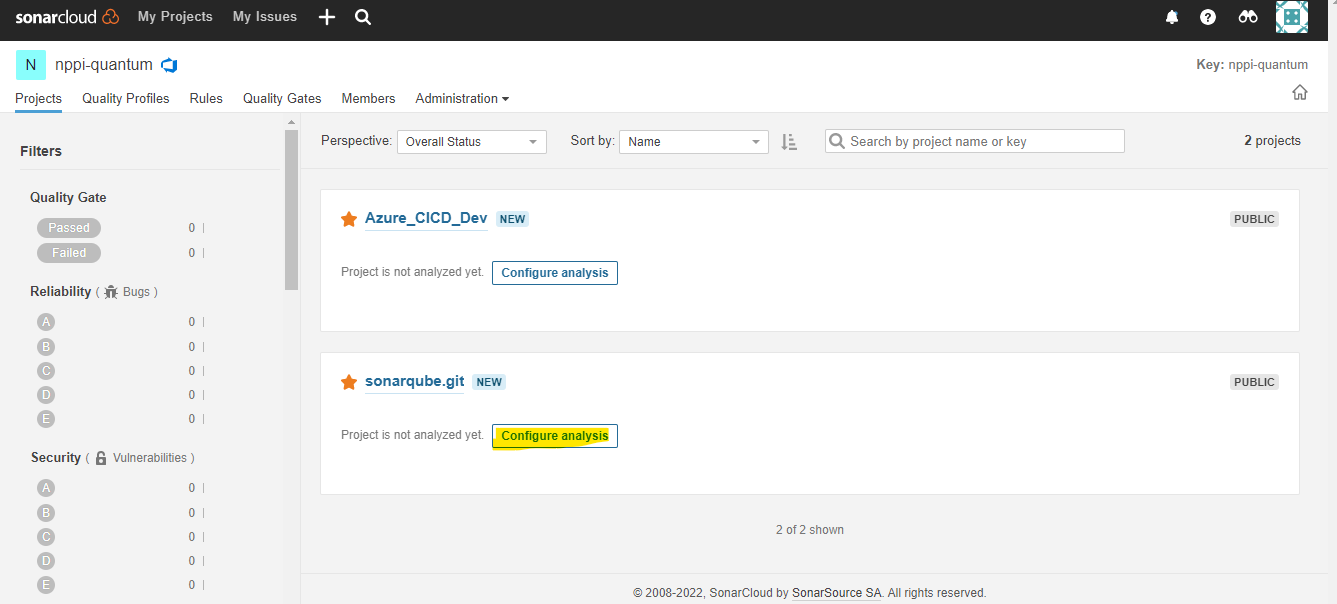
Click on Analyze Project


Click on Configure Analysis
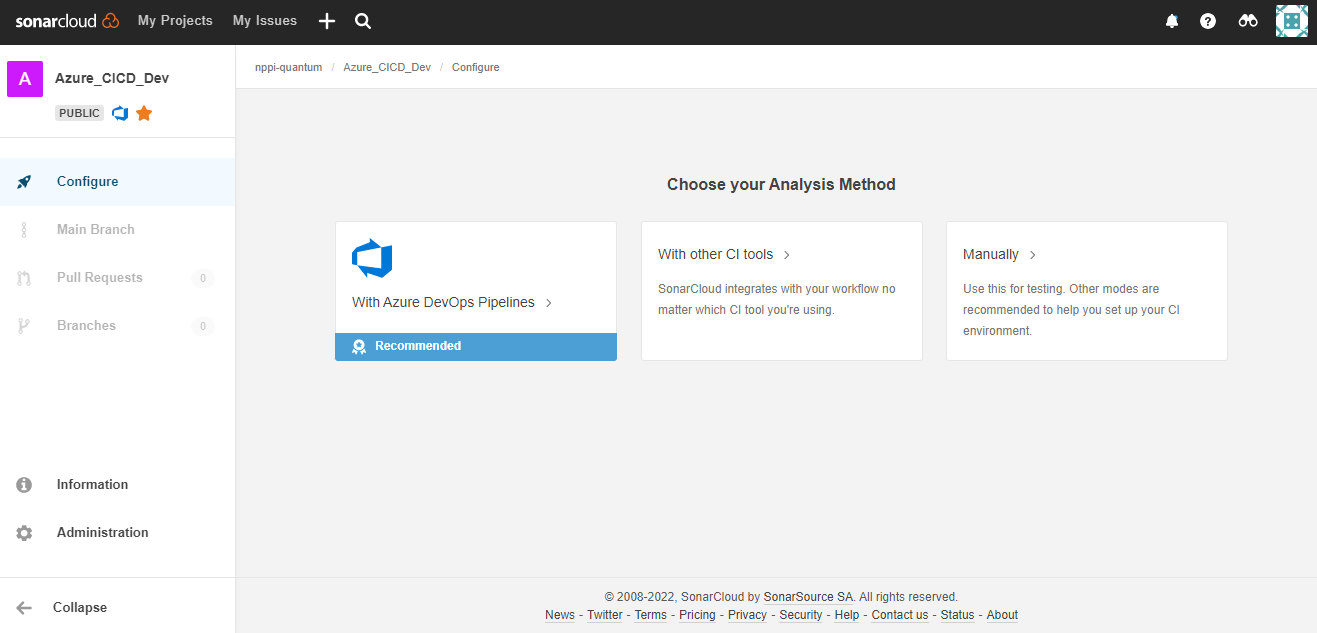

Click on Continue and copy token :
54b9342183da3c2b514aff00ed04f86d5b855d89
Service Connection


Add Service Connection Type “Sonarqube”
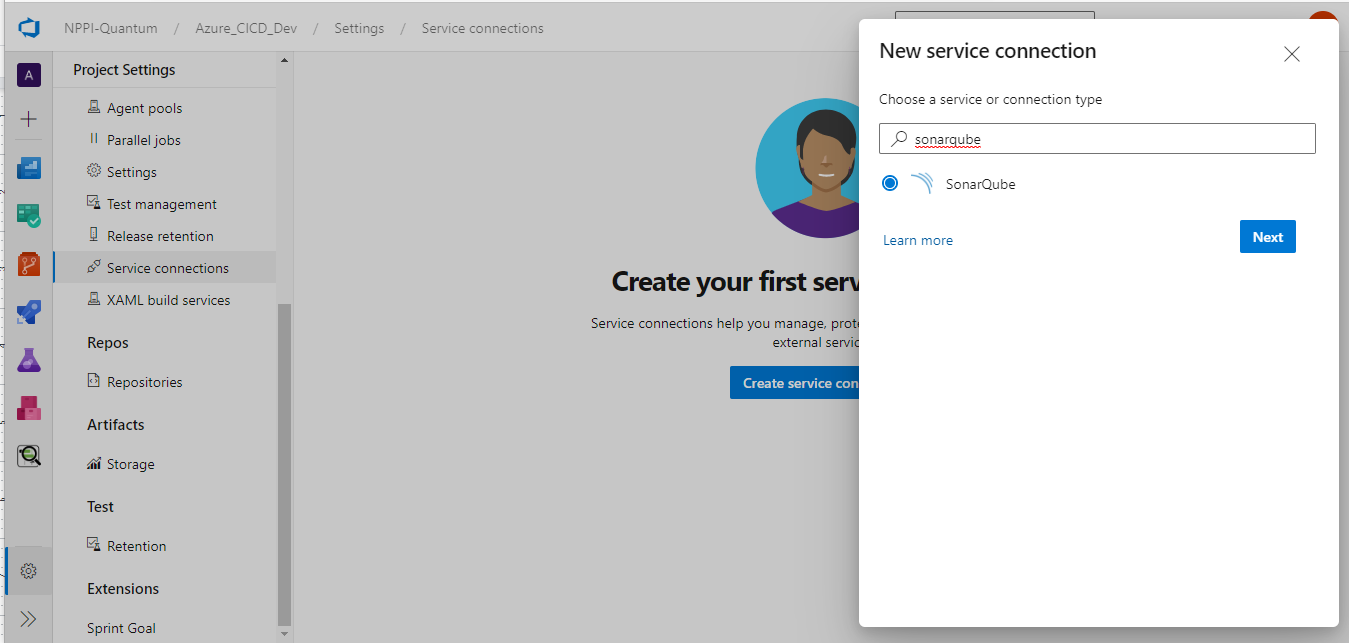

Choose Code type accordingly, in our case its .Net.

Add 3 Tasks mentioned as above in the Pipelines


For the Pipeline, instead of Manually adding all the tasks, we can add by selecting .Net Desktop template
SonarCloud Pipeline Using Template
New Pipeline > Classic Editor

Select .NET Desktop with SonarCloud
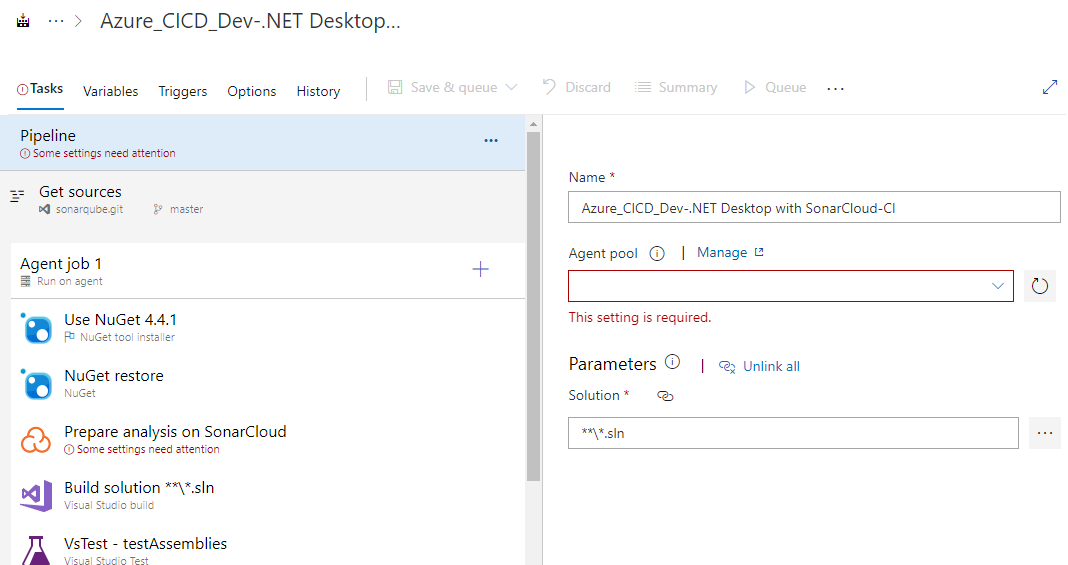
Follow the Task 1 instruction in SonarCloud

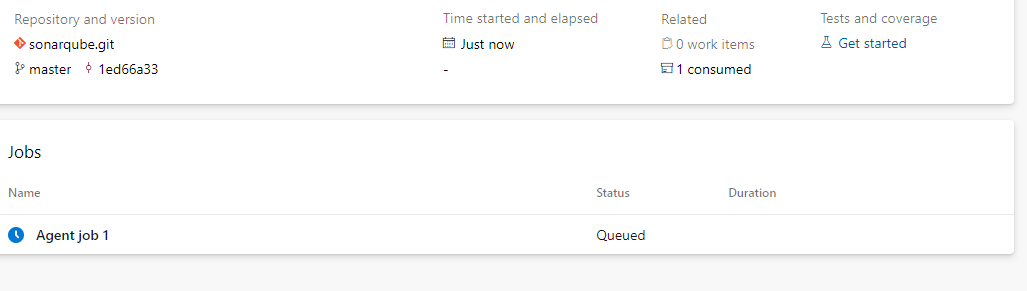
Save & Run


As pipeline is successfully completed, Check SonarCloud for any Bugs & Issues

Found 3 Issues

THE END
